| libnfc是首个遵循GNU(自由工程项目)通用公共许可证针对所有人都完全免费的低级别NFC软件开发包和编程应用程序接口。它提供了完整的透明度且免费供大家使用。该库目前支持调制ISO / IEC14443 A和B,FeliCa,Jewel/Topaz标签及数据交换协议(P2P)作为目标和启动程序。想了解更多关于libnfc的信息,可参考http://nfc-tools.org/ITEAD PN532 NFC模块配有双排引脚,可直接通过排线连接到树莓派,然后树莓派将驱动模块进行非接触式近场通信操作,如读写13.56M IC卡。
以下教程,演示如何在树莓派上使用libnfc通过SPI总线来驱动ITEAD PN532 模块。
1, 硬件链接
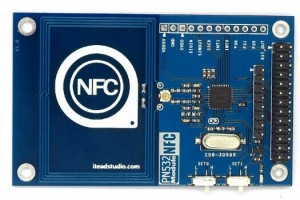
Itead PN532 Module是使用四条线连接,如下图

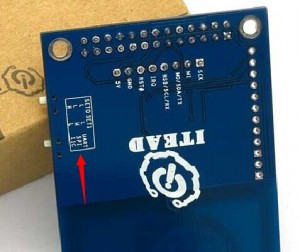
按照上图的连接方式,Itead PN532 模块是通过SPI总线与树莓派连接的,所以需要把NFC模块的工作模式设置为I2C模式,如下图:
即 : SET0–>H SET1–>L
2,安装依赖的软件包
sudo apt-get update
sudo apt-get install libusb-dev libpcsclite-dev
3,下载并解压缩libnfc源码包
cd ~
wget http://dl.bintray.com/nfc-tools/sources/libnfc-1.7.1.tar.bz2
tar -xf libnfc-1.7.1.tar.bz2
4,编译与安装
cd libnfc-1.7.1
./configure –prefix=/usr –sysconfdir=/etc
make
sudo make install
5, 修改配置文件
cd /etc
sudo mkdir nfc
sudo nano /etc/nfc/libnfc.conf
将如下内容复制到/etc/nfc/libnfc.conf文件中:
# Allow device auto-detection (default: true)
# Note: if this auto-detection is disabled, user has to set manually a device
# configuration using file or environment variable
allow_autoscan = true
# Allow intrusive auto-detection (default: false)
# Warning: intrusive auto-detection can seriously disturb other devices
# This option is not recommended, user should prefer to add manually his device.
allow_intrusive_scan = false
# Set log level (default: error)
# Valid log levels are (in order of verbosity): 0 (none), 1 (error), 2 (info), 3 (debug)
# Note: if you compiled with –enable-debug option, the default log level is “debug”
log_level = 1
# Manually set default device (no default)
# To set a default device, you must set both name and connstring for your device
# Note: if autoscan is enabled, default device will be the first device available in device list.
device.name = “Itead_PN532_SPI”
device.connstring = “pn532_i2c:/dev/i2c-1”
6,树莓派系统默认是将SPI模块的驱动关闭的,我们需要将其打开;
sudo nano /etc/modprobe.d/raspi-blacklist.conf
树莓派开启I2C总线,将/etc/modprobe.d/raspi-blacklist.conf中“blacklist i2c-bcm2708”变为“#blacklist i2c-bcm2708”
在/etc/modules末尾添加一行 “i2c-dev”
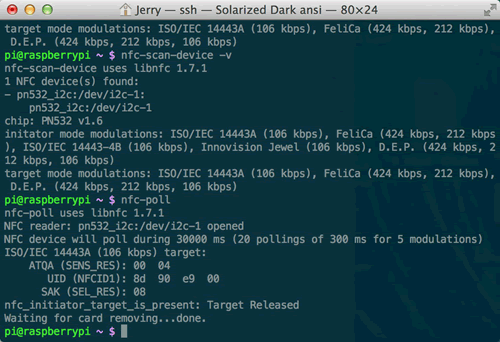
刷卡测试,运行效果如图:
———————————————————————————————–
参考资料附录&相关链接:
A1. libnfc配置方法:http://nfc-tools.org/index.php?title=Libnfc:configuration
A2. libnfc安装教程:http://nfc-tools.org/index.php?title=Libnfc
A3. libnfc用户API:http://nfc-tools.org/index.php?title=Libnfc:API
A4. libnfc主页:http://nfc-tools.org/index.php?title=Main_Page
A5. libnfc学习例程:ibnfc:Examples” target=”_blank”>http://nfc-tools.org/index.php?title=Category ibnfc:Examples ibnfc:Examples
A6. Iteadstudio PN532 Module 网址 http://imall.iteadstudio.com/im130625002.html
A7. Disable R-Pi/RASPBIAN serial console for using UART0 http://learn.adafruit.com/adafruit-nfc-rfid-on-raspberry-pi/freeing-uart-on-the-pi
————————————————————————————————-
教程到此结束,谢谢大家!有问题请留言或微博@ITEAD创易工作室 |