
訓練擴散模型
無條件圖像生成是擴散模型的一種流行應用,它生成的圖像與用於訓練的數據集中的圖像相似。通常,最好的結果是通過在特定數據集上微調預訓練模型來獲得的。您可以在 Hub 上找到許多這樣的檢查點,但如果您找不到您喜歡的檢查點,您可以隨時訓練自己的檢查點!
本教程將教您如何在 Smithsonian Butterflies 數據集的子集上從頭開始訓練 UNet2DModel,以生成您自己的 🦋 蝴蝶 🦋。
💡 本培訓教程基於 🧨 擴散器筆記本進行培訓。有關擴散模型的更多詳細信息和背景(例如它們的工作原理),請查看筆記本!
在開始之前,請確保您安裝了🤗數據集來加載和預處理圖像數據集,並安裝了🤗加速,以簡化在任意數量的 GPU 上的訓練。以下命令還將安裝 TensorBoard 以可視化訓練指標(您還可以使用權重和偏差來跟踪您的訓練)。
我們鼓勵您與社區分享您的模型,為此,您需要登錄您的 Hugging Face 帳戶(如果您還沒有帳戶,請在此處創建一個!)。您可以從筆記本登錄並在出現提示時輸入您的令牌:
Copied>>> from huggingface_hub import notebook_login >>> notebook_login()
或者從終端登錄:
Copiedhuggingface-cli login
由於模型檢查點非常大,因此安裝 Git-LFS 來對這些大文件進行版本控制:
Copied!sudo apt -qq install git-lfs !git config –global credential.helper store
訓練配置
為了方便起見,創建一個包含訓練超參數的 TrainingConfig 類(隨意調整它們):
Copied>>> from dataclasses import dataclass >>> @dataclass … class TrainingConfig: … image_size = 128 # the generated image resolution … train_batch_size = 16 … eval_batch_size = 16 # how many images to sample during evaluation … num_epochs = 50 … gradient_accumulation_steps = 1 … learning_rate = 1e-4 … lr_warmup_steps = 500 … save_image_epochs = 10 … save_model_epochs = 30 … mixed_precision = “fp16” # `no` for float32, `fp16` for automatic mixed precision … output_dir = “ddpm-butterflies-128” # the model name locally and on the HF Hub … push_to_hub = True # whether to upload the saved model to the HF Hub … hub_private_repo = False … overwrite_output_dir = True # overwrite the old model when re-running the notebook … seed = 0 >>> config = TrainingConfig()
加載數據集
您可以使用 🤗 數據集庫輕鬆加載史密森尼蝴蝶數據集:
Copied>>> from datasets import load_dataset >>> config.dataset_name = “huggan/smithsonian_butterflies_subset” >>> dataset = load_dataset(config.dataset_name, split=”train”)
💡 您可以從 HugGan 社區活動中找到其他數據集,也可以通過創建本地 ImageFolder 來使用自己的數據集。如果數據集來自 HugGan 社區活動,則將 config.dataset_name 設置為數據集的存儲庫 ID;如果您使用自己的圖像,則將 imagefolder 設置為。
🤗 Datasets 使用 Image 功能自動解碼圖像數據並將其加載為我們可以可視化的 PIL.Image :
Copied>>> import matplotlib.pyplot as plt >>> fig, axs = plt.subplots(1, 4, figsize=(16, 4)) >>> for i, image in enumerate(dataset[:4][“image”]): … axs[i].imshow(image) … axs[i].set_axis_off() >>> fig.show()

不過,這些圖像的尺寸各不相同,因此您需要先對它們進行預處理:
Resize將圖像大小更改為config.image_size中定義的大小。RandomHorizontalFlip通過隨機鏡像圖像來擴充數據集。Normalize對於將像素值重新縮放到 [-1, 1] 範圍非常重要,這是模型所期望的。
Copied>>> from torchvision import transforms >>> preprocess = transforms.Compose( … [ … transforms.Resize((config.image_size, config.image_size)), … transforms.RandomHorizontalFlip(), … transforms.ToTensor(), … transforms.Normalize([0.5], [0.5]), … ] … )
使用 🤗 數據集的 set_transform 方法在訓練期間動態應用 preprocess 函數:
Copied>>> def transform(examples): … images = [preprocess(image.convert(“RGB”)) for image in examples[“image”]] … return {“images”: images} >>> dataset.set_transform(transform)
請隨意再次可視化圖像以確認它們已調整大小。現在您已準備好將數據集包裝在 DataLoader 中進行訓練!
Copied>>> import torch >>> train_dataloader = torch.utils.data.DataLoader(dataset, batch_size=config.train_batch_size, shuffle=True)
創建 UNet2D 模型
🧨 Diffusers 中的預訓練模型可以使用您想要的參數輕鬆地從其模型類創建。例如,要創建 UNet2DModel:
Copied>>> from diffusers import UNet2DModel >>> model = UNet2DModel( … sample_size=config.image_size, # the target image resolution … in_channels=3, # the number of input channels, 3 for RGB images … out_channels=3, # the number of output channels … layers_per_block=2, # how many ResNet layers to use per UNet block … block_out_channels=(128, 128, 256, 256, 512, 512), # the number of output channels for each UNet block … down_block_types=( … “DownBlock2D”, # a regular ResNet downsampling block … “DownBlock2D”, … “DownBlock2D”, … “DownBlock2D”, … “AttnDownBlock2D”, # a ResNet downsampling block with spatial self-attention … “DownBlock2D”, … ), … up_block_types=( … “UpBlock2D”, # a regular ResNet upsampling block … “AttnUpBlock2D”, # a ResNet upsampling block with spatial self-attention … “UpBlock2D”, … “UpBlock2D”, … “UpBlock2D”, … “UpBlock2D”, … ), … )
快速檢查樣本圖像形狀與模型輸出形狀是否匹配通常是個好主意:
Copied>>> sample_image = dataset[0][“images”].unsqueeze(0) >>> print(“Input shape:”, sample_image.shape) Input shape: torch.Size([1, 3, 128, 128]) >>> print(“Output shape:”, model(sample_image, timestep=0).sample.shape) Output shape: torch.Size([1, 3, 128, 128])
偉大的!接下來,您需要一個調度程序來向圖像添加一些噪聲。
創建調度程序
根據您使用模型進行訓練還是推理,調度程序的行為會有所不同。在推理過程中,調度器根據噪聲生成圖像。在訓練期間,調度程序從擴散過程中的特定點獲取模型輸出(或樣本),並根據噪聲調度和更新規則將噪聲應用於圖像。
讓我們看一下 DDPMScheduler,並使用 add_noise 方法向之前的 sample_image 添加一些隨機噪聲:
Copied>>> import torch >>> from PIL import Image >>> from diffusers import DDPMScheduler >>> noise_scheduler = DDPMScheduler(num_train_timesteps=1000) >>> noise = torch.randn(sample_image.shape) >>> timesteps = torch.LongTensor([50]) >>> noisy_image = noise_scheduler.add_noise(sample_image, noise, timesteps) >>> Image.fromarray(((noisy_image.permute(0, 2, 3, 1) + 1.0) * 127.5).type(torch.uint8).numpy()[0])
模型的訓練目標是預測添加到圖像中的噪聲。這一步的損失可以通過下式計算:
Copied>>> import torch.nn.functional as F >>> noise_pred = model(noisy_image, timesteps).sample >>> loss = F.mse_loss(noise_pred, noise)
訓練模型
到目前為止,您已經掌握了開始訓練模型的大部分內容,剩下的就是將所有內容組合在一起。
首先,您需要一個優化器和一個學習率調度器:
Copied>>> from diffusers.optimization import get_cosine_schedule_with_warmup >>> optimizer = torch.optim.AdamW(model.parameters(), lr=config.learning_rate) >>> lr_scheduler = get_cosine_schedule_with_warmup( … optimizer=optimizer, … num_warmup_steps=config.lr_warmup_steps, … num_training_steps=(len(train_dataloader) * config.num_epochs), … )
然後,您需要一種評估模型的方法。為了進行評估,您可以使用 DDPMPipeline 生成一批樣本圖像並將其保存為網格:
Copied>>> from diffusers import DDPMPipeline >>> from diffusers.utils import make_image_grid >>> import math >>> import os >>> def evaluate(config, epoch, pipeline): … # Sample some images from random noise (this is the backward diffusion process). … # The default pipeline output type is `List[PIL.Image]` … images = pipeline( … batch_size=config.eval_batch_size, … generator=torch.manual_seed(config.seed), … ).images … # Make a grid out of the images … image_grid = make_image_grid(images, rows=4, cols=4) … # Save the images … test_dir = os.path.join(config.output_dir, “samples”) … os.makedirs(test_dir, exist_ok=True) … image_grid.save(f”{test_dir}/{epoch:04d}.png”)
現在,您可以使用 🤗 Accelerate 將所有這些組件包裝在一個訓練循環中,以輕鬆進行 TensorBoard 日誌記錄、梯度累積和混合精度訓練。要將模型上傳到 Hub,請編寫一個函數來獲取存儲庫名稱和信息,然後將其推送到 Hub。
💡 下面的訓練循環可能看起來令人生畏且漫長,但是當您僅用一行代碼啟動訓練時,這一切都是值得的!如果您迫不及待地想要開始生成圖像,請隨意複製並運行下面的代碼。您可以隨時返回並更仔細地檢查訓練循環,例如當您等待模型完成訓練時。 🤗
Copied>>> from accelerate import Accelerator >>> from huggingface_hub import HfFolder, Repository, whoami >>> from tqdm.auto import tqdm >>> from pathlib import Path >>> import os >>> def get_full_repo_name(model_id: str, organization: str = None, token: str = None): … if token is None: … token = HfFolder.get_token() … if organization is None: … username = whoami(token)[“name”] … return f”{username}/{model_id}” … else: … return f”{organization}/{model_id}” >>> def train_loop(config, model, noise_scheduler, optimizer, train_dataloader, lr_scheduler): … # Initialize accelerator and tensorboard logging … accelerator = Accelerator( … mixed_precision=config.mixed_precision, … gradient_accumulation_steps=config.gradient_accumulation_steps, … log_with=”tensorboard”, … project_dir=os.path.join(config.output_dir, “logs”), … ) … if accelerator.is_main_process: … if config.push_to_hub: … repo_name = get_full_repo_name(Path(config.output_dir).name) … repo = Repository(config.output_dir, clone_from=repo_name) … elif config.output_dir is not None: … os.makedirs(config.output_dir, exist_ok=True) … accelerator.init_trackers(“train_example”) … # Prepare everything … # There is no specific order to remember, you just need to unpack the … # objects in the same order you gave them to the prepare method. … model, optimizer, train_dataloader, lr_scheduler = accelerator.prepare( … model, optimizer, train_dataloader, lr_scheduler … ) … global_step = 0 … # Now you train the model … for epoch in range(config.num_epochs): … progress_bar = tqdm(total=len(train_dataloader), disable=not accelerator.is_local_main_process) … progress_bar.set_description(f”Epoch {epoch}”) … for step, batch in enumerate(train_dataloader): … clean_images = batch[“images”] … # Sample noise to add to the images … noise = torch.randn(clean_images.shape).to(clean_images.device) … bs = clean_images.shape[0] … # Sample a random timestep for each image … timesteps = torch.randint( … 0, noise_scheduler.config.num_train_timesteps, (bs,), device=clean_images.device … ).long() … # Add noise to the clean images according to the noise magnitude at each timestep … # (this is the forward diffusion process) … noisy_images = noise_scheduler.add_noise(clean_images, noise, timesteps) … with accelerator.accumulate(model): … # Predict the noise residual … noise_pred = model(noisy_images, timesteps, return_dict=False)[0] … loss = F.mse_loss(noise_pred, noise) … accelerator.backward(loss) … accelerator.clip_grad_norm_(model.parameters(), 1.0) … optimizer.step() … lr_scheduler.step() … optimizer.zero_grad() … progress_bar.update(1) … logs = {“loss”: loss.detach().item(), “lr”: lr_scheduler.get_last_lr()[0], “step”: global_step} … progress_bar.set_postfix(**logs) … accelerator.log(logs, step=global_step) … global_step += 1 … # After each epoch you optionally sample some demo images with evaluate() and save the model … if accelerator.is_main_process: … pipeline = DDPMPipeline(unet=accelerator.unwrap_model(model), scheduler=noise_scheduler) … if (epoch + 1) % config.save_image_epochs == 0 or epoch == config.num_epochs – 1: … evaluate(config, epoch, pipeline) … if (epoch + 1) % config.save_model_epochs == 0 or epoch == config.num_epochs – 1: … if config.push_to_hub: … repo.push_to_hub(commit_message=f”Epoch {epoch}”, blocking=True) … else: … pipeline.save_pretrained(config.output_dir)
唷,那是相當多的代碼!但您終於準備好使用 🤗 Accelerate 的 notebook_launcher 函數啟動訓練了。向函數傳遞訓練循環、所有訓練參數和進程數(您可以將此值更改為可用的 GPU 數量)以用於訓練:
Copied>>> from accelerate import notebook_launcher >>> args = (config, model, noise_scheduler, optimizer, train_dataloader, lr_scheduler) >>> notebook_launcher(train_loop, args, num_processes=1)
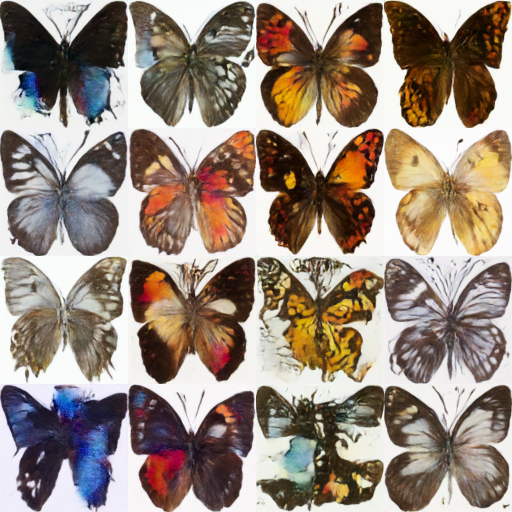
訓練完成後,查看擴散模型生成的最終 🦋 圖像 🦋!
Copied>>> import glob >>> sample_images = sorted(glob.glob(f”{config.output_dir}/samples/*.png”)) >>> Image.open(sample_images[-1])
下一步
無條件圖像生成是可訓練任務的一個示例。您可以訪問🧨 擴散器培訓示例頁面來探索其他任務和培訓技術。以下是您可以學到的一些示例:
- 文本反轉,一種向模型傳授特定視覺概念並將其集成到生成圖像中的算法。
- DreamBooth,一種在給定主題的多個輸入圖像的情況下生成主題的個性化圖像的技術。
- 在您自己的數據集上微調穩定擴散模型的指南。
- LoRA 使用指南,這是一種內存高效技術,可以更快地微調大型模型。