What was Shepherd Book’s past in Firefly? 冲出宁静号里面的牧师到底有什么背景


Derrial Book

看宁静号的时候,有些情景比较有趣,牧师作为牧师,居然对枪、杀手等非常熟悉,尤其在中枪之后,被送到联盟要求救治被拒后,拿出身份卡,联盟立即就开始救助,并且给宁静号上所有人都治疗并释放了。这是有多高的地位的人才能享有的待遇。在豆瓣小组里面翻了一圈,貌似没有找到。google了一圈,总算找到一些蛛丝马迹。

google上推荐去看Serenity: The Shepherd’s Tale,这个漫画里面似乎有介绍,可惜要求美刀去买,而且不知道猴年马月才能到(猴年马月其实再过一个月就到了)。继续看看大家的评论,终于找到了。


Shepherd Book was abused as a boy, and lived on the street for a while. He wasn’t born under the name Shepherd Book, BTW. He joined up with the independence movement, and volunteered to be a spy on the Alliance. He was an officer until he led a brilliant defeat, after which he was discharged. He later lived in a monastery for a time, and became the preacher we all know:-)


TL;DR: Book’s official status within the Alliance (and therefore on his ident chip) was that of a retired Alliance commander. This would result in VIP treatment at most Alliance facilities.


I’ll outline his entire known history in the spoiler tags below. Most of this is outlined in the comic “The Shepherd’s Tale“, which is essentially Book reflecting back on his life while dying at Haven.

Early Life

Originally named Henry Evans, the man we know as Derrial Book was born on a border planet to an abusive father. At the age of ten, he ran away from home and became adept at survival on the streets. He eventually garnered some reputation as a thief & criminal, but ended up joining the growing Independence Movement.

Life as a Browncoat

In the four years before his Alliance assignment, Evans quickly became known for his vicious skills in combat – easily (and brutally) taking down entire squads of Alliance soldiers during missions. When the Browncoats began looking for a long-term operative who could infiltrate the Alliance military as a double agent, Evans volunteered. He needed a new identity, so he murdered a random citizen named Derrial Book and took that name as his own.

Life in the Alliance

Once in the Alliance, Book began a “meteoric” rise through the ranks. He was seen as totally committed to the cause and earned a reputation for using savage tactics against the Browncoats, quickly becoming known as a master interrogator. Because of his rising rank & influence, Book found himself increasingly able to both damage the Alliance plans as well as cover up losses or information leaks. He quickly became a vital asset for the Browncoats, but also one of their most guarded secrets.

Retirement

Book eventually found himself in command (or perhaps XO) of the IAV Cortez, an Alliance cruiser which oversaw an operation intended to end the Unification War in a single stroke. Book himself was in charge of the operation, which involved committing massive resources into striking multiple targets at once. Due to Book’s involvement, however, the operation was actually a huge ambush. Numerous forces were lost, including the total destruction of the IAV Alexander and all 4000 crew. Considered one of the largest defeats in Alliance history, the entire operation was swept under the rug and Derrial Book was quietly discharged from Alliance service.

Life at the Abbey

With the Independent Movement crushed soon after, Book wasn’t sure what to do with himself. He wandered the outer territories, weary of his life and drowning his sorrows in alcohol. At one point, he finds himself at a church and comes to see religion as a way to atone for the many people he had killed throughout his life. It apparently worked, as he eventually ended up at theSouthdown Abbey on Persephone. Book finally found peace tending the Abbey’s garden, but knew he couldn’t stay there indefinitely.

Life on Serenity

After an unknown amount of time at the Abbey (but presumably several years), Book decided to leave and get back out into the galaxy. The Abbey had access to the Cortex, and Book had tired of watching others suffer along the rim. He announced his intention to carry the Lord’s message out to others, and this leads us directly to his introduction in S01E01 “Serenity”.

As for your specific question, his ident chip reflected his official status with the Alliance – a retired Captain or Commander. Especially in a medical situation like that, a status like that would require any Alliance officer to render immediate assistance.

Henry Evans had a troubled childhood and was a criminal for a time before enlisting with the independence movement. As a member of The Independence he volunteered to spy on The Alliance. He killed a man named Derrial Book assumed his identity to enlisted in the Alliance Military. While still working as a spy for The Independence he quickly worked up the Alliance ranks to become a prominent officer. At a key point during the war he intentionally lost a major battle dealing a crushing blow to the alliance and leading to him being discharged. This loss was so crushing that the alliance made a point to wipe all record of it out. Meaning on paper shepherd Book is nothing but a retired prominent Alliance officer. After being discharged he “found god in a bowl of soup” while at a soup kitchen and decided to join an Abby. He eventually left and ended up boarding Serenity.


Source:http://scifi.stackexchange.com/questions/166/what-was-shepherd-books-past-in-firefly

Biography
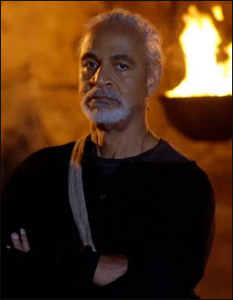
To the crew of Serenity, Derrial Book’s past was a mystery. He indicated early on that he was a shepherd who had been living in theSouthdown Abbey and that he never married.[1] In truth, “Derrial” was not even the shepherd’s real name, but rather the name of a man he had killed.

Book, whose birth name was Henry Evans, lived as a young boy in dread of his highly abusive father. He would listen to music to take himself to a peaceful place in his mind, only to be beaten. He finally chose to leave home, but after ten years had merely established himself as a successful thief, adept at avoiding law enforcement. He was then recruited by the Independence Movement, a representative of which having been impressed at his excellent combat potential. In four years he honed his fighting skills, easily defeating heavily-armed federal agents singlehandedly. Evans was not known among his Independence peers to attend their meetings, but he showed up for one and there he volunteered to take part in a highly-sensitive mole operation. Since the Independence organizers had learned that the Alliancewas creating warships, they plotted to plant a long-term mole to rise through the ranks of the Alliance and subvert them at every turn. Henry’s left eye was extracted and replaced with a biorobotic camera and transmitter, which would provide excellent surveillance. To join the Alliance, he needed a new identity. So he lured an unsuspecting young man named Derrial Book into an alley, murdered him with a garrote, and took on this name permanently.

In four short years, he orchestrated a “meteoric” rise through the Alliance ranks and was selected for the officer corps from the law enforcement on Jiangyin. He utilized brutal beatings on captured Independence members—men and women alike—which impressed his superiors. After six years, he was an officer aboard the I.A.V. Cortez, where he directed the final movement of an Alliance operation to ambush Independence transports on a massive scale: six installations on different planets and at least one space-borne transport convoy were raided by Alliance forces at the same moment, but each was ambushed. It was the “single greatest disaster in Alliance history”. The most prominent loss was the destruction of the I.A.V. Alexander and the loss of all 4,000 souls aboard; elsewhere, about 300 soldiers were captured. Book was immediately discharged without trial and thrown into an escape vessel in disgrace.

He lived as a derelict for six years after until he experienced an epiphany about his place in the universe while staring into a bowl of chicken soup. He was suddenly seized with purpose, and joined the Southdown Abbeywhere he remained for a decade, until he finally chose to leave the abbey—on good terms and with encouragement—and become a missionary. He then joined the crew of Serenity.

Book frequently made references to Christian theology and consulted and quoted the Bible. But Book later expressed concern that he was being corrupted by living on Serenity and he left the ship[5] and moved to the planet Haven. There he was killed by an Alliance soldier sent to destroy Haven after Serenity managed to shake an Alliance assassin known only as “the Operative”. However, he was not a passive figure in the events leading up to his death; he defended Haven and shot down the A.V.-Sparrow that attacked the settlement.After taking down the ship, Mal told Book that he did the right thing, to which Book replied, “Coming from you, that means almost nothing.”

“I don’t care what you believe. Just believe it!”~ Book’s dying words to Mal

Source: http://firefly.wikia.com/wiki/Derrial_Book

FTP时显示500 Illegal PORT command的解决

使用EditPlus打开FTP服务器上的文件时,发现连接不了

在windows的dos窗口用FTP命令去连时,可以登录,但使用ls等命令时,出现:
500 Illegal PORT command.
425 Use PORT or PASV first.
根据提示是被动模式的问题

在EditPlus的FTP设定高级选项中,选上passive FTP mode即可而dos窗口的FTP命令则无法设置为被动模式

FTP主/被动模式的原理
————————————————————————————————————————————————–
FTP是File Transfer Protocol(文件传输协议)的缩写,用来在两台计算机之间互相传送文件相比于HTTP,FTP协议要复杂得多复杂的原因,是因为FTP协议要用到两个TCP连接,一个是命令链路,用来在FTP客户端与服务器之间传递命令;另一个是数据链路,用来上传或下载数据

FTP协议有两种工作方式:PORT方式和PASV方式,中文意思为主动式和被动式

PORT(主动)方式的连接过程是:客户端向服务器的FTP端口(默认是21)发送连接请求,服务器接受连接,建立一条命令链路当需要传送数据时,客户端在命令链路上用PORT命令告诉服务器:我打开了XXXX端口,你过来连接我于是服务器从20端口向客户端的XXXX端口发送连接请求,建立一条数据链路来传送数据

PASV(被动)方式的连接过程是:客户端向服务器的FTP端口(默认是21)发送连接请求,服务器接受连接,建立一条命令链路当需要传送数据时,服务器在命令链路上用PASV命令告诉客户端:我打开了XXXX端口,你过来连接我于是客户端向服务器的XXXX端口发送连接请求,建立一条数据链路来传送数据
概括:
——————————————————————————–
主动模式:服务器向客户端敲门,然后客户端开门
被动模式:客户端向服务器敲门,然后服务器开门

所以,如果你是如果通过代理上网的话,就不能用主动模式,因为服务器敲的是上网代理服务器的门,而不是敲客户端的门
而且有时候,客户端也不是轻易就开门的,因为有防火墙阻挡,除非客户端开放大于1024的高端端口

——————————————————————————–
要用主动模式来下载,请您把下载工具的被动模式(PASV)都不要打勾,用主动模式来下载就OK了,如果在出错,那就被动主动相互转换一下

常见的FTP客户端软件的PASV方式的关闭方法

大部分FTP客户端默认使用PASV方式,PASV模式的意式是被动模式 在大部分FTP客户端的设置里,常见到的字眼都是PASV或被动模式

IE: 工具 -> Internet选项 -> 高级 -> 使用被动FTP(需要IE6.0以上才支持)

CuteFTP: Edit -> Setting -> Connection -> Firewall -> PASV Mode
或 File -> Site Manager,在左边选中站点 -> Edit -> Use PASV mode

FlashGet: 工具 -> 选项 -> 代理服务器 -> 直接连接 -> 编辑 -> PASV模式

FlashFXP: 选项 -> 参数选择 -> 代理/防火墙/标识 -> 使用被动模式
或 站点管理 -> 对应站点 -> 选项 -> 使用被动模式
或 快速连接 -> 切换 -> 使用被动模式

LeapFTP: Option ->Preferences -> General->Proxy->Use Pasv Mode

MOUNT AN SMB NETWORK DRIVE ON RASPBERRY PI

original post: http://geeks.noeit.com/mount-an-smb-network-drive-on-raspberry-pi/

In this tutorial we will describe how to connect your Raspberry Pi to a network drive and permanently mount it to your system. Even though this article uses a Raspberry Pi as an example to connect to an SMB drive, the steps used can be applied to any Debian based system, such as Ubuntu.

If you have a Raspberry Pi you might have noticed that the storage possibilities are kind of limited unless you have some external storage. Even though you can get SD cards with 64+gb of storage, you probably want more if you have a lot of music and movies that you are streaming through your Pi.

There are several choices when it comes to storage for your Pi, such as network drives, flash drives, or external USB HDDs. Using a network drive you can not only access your files from the Pi, but from any computer connected to your network, which is very convenient.

Prerequisites

Before we start, I will assume you already

  1. have a network drive connected to your LAN, and
  2. know its LAN IP address

Note: remember to change all text in red to your own values.


Installation

In order to mount the drive, you need to have cifs-utils installed on your system. If you are running a newer version of Raspbian or RaspBMC you should already have this installed. You can check whether it is installed or not by running the following command:

dpkg -s cifs-utils

If it is installed, it should output something like this:

Package: cifs-utils
 Status: install ok installed
 Priority: optional
 Section: otherosfs
 Installed-Size: 189
 Maintainer: Debian Samba Maintainers <pkg-samba-maint@lists.alioth.debian.org> Architecture: armhf
 Version: 2:5.5-1
 ...

If it says that it’s not installed, you need to install it:

sudo apt-get install cifs-utils


Mounting unprotected (guest) network folders

You might have public folders on your network drive that can be accessed by anyone without having to provide any credentials. These are mounted in the same way as password-protected folders (we will mount these in the next section), but with a few different options.

First, let’s create a directory on the Pi where we want to mount the directory. You will need a separate directory for each network folder that you want to mount. I will create the folders in the /media folder:

sudo mkdir -p /media/networkshare/public

Then edit your /etc/fstab file (with root privileges) and add this line:

//192.168.0.18/publicshare /media/networkshare/public cifs guest,uid=1000,gid=1000,iocharset=utf8 0 0

The first part is the IP of your network drive, and the public folder you want to mount.
The second part is the folder on your local machine where you want to mount the network share.
The third part indicates what type of drive you want to mount (cifs).

The last part is the set of options you can pass, and here’s an explanation of the ones we are using:

  • guest is basically telling the network drive that it’s a public share, and you don’t need a password to access it (not to confuse with username),
  • uid=1000 makes the Pi user with this id the owner of the mounted share, allowing them to rename files,
  • gid=1000 is the same as uid but for the user’s group,
  • iocharset=utf8 allows access to files with names in non-English languages.

Note: If there is any space in the server path, you need to replace it by \040, for example //192.168.0.18/My\040Documents

To find the uid and gid for your username, use the following command:

id username

Now that we have added this to our /etc/fstab, we need to (re)mount all entries listed in /etc/fstab:

sudo mount -a

Now you can access your network drive from /media/networkshare/public (or wherever you chose to mount it).


Mount password-protected network folders

Mounting a password-protected share is very similar to mounting a public ones, with some minor changes to the options we pass. Let’s start by making a new folder where we want to mount the password-protected share:

sudo mkdir -p /media/networkshare/protected

Again, open /etc/fstab (with root privileges), and add this line:

//192.168.0.18/protectedshare /media/networkshare/protected cifs username=msusername,password=mspassword,uid=1000,gid=1000,iocharset=utf8 0 0

While this is a perfectly valid way of mounting your protected folder, it’s not very secure. Since /etc/fstab is readable by everyone, so are your credentials in it. So, let’s make it more secure by using a credentials file. This file will contain nothing else but your username and password, but we will make readable only to you. This way, other users on the system won’t be able to see your credentials.

Using a text editor, create a file that will contain the credentials for your protected network share:

vim ~/.smbcredentials

Enter your username and password for the protected share in the file:

username=msusername
password=mspassword

Save the file.

Change the permissions of the file to make sure only you can read it:

chmod 600 ~/.smbcredentials

Then edit your /etc/fstab file and change the line where we are mounting the protected share to look like this:

//192.168.0.18/protectedhare /media/networkshare/protected cifs credentials=/home/username/.smbcredentials,uid=1000,gid=1000,iocharset=utf8 0 0

Save the file.

Again, we need to (re)mount all entries listed in /etc/fstab:

sudo mount -a


Now you’re all set to access your public and protected folders from your Pi.


firefly – serenity 萤火虫 冲出宁静号

serentiyFireFly  serenity-summer_00354141

最近总算追完了《firefly》这部美剧,然后又看了《Serenity》这部电影,算是交代了电视剧的结局。

Take my love
Take my land
Take me where I cannot stand
I don’t care,I’m still free
You can’t take the sky from me

Take me out to the black
Tell them I ain’t coming back
Burn the land and boil the sea
You can’t take the sky from me

There’s no place I can be
Since I found Serenity
But you can’t take the sky from me

这部电视剧以这首歌开始,体现了电视剧的基本内容:

即使夺走了我的爱和我的土地,让我无处可栖,但是我不怕,我向往自由,你无法夺走我的天空。

听到对白里面英语里面掺杂着我也听不懂的中国话,总感觉怪怪的。后来才知道导演比较喜欢中国,认为未来是中国的天下,剧中未来的世界,汉语和英语是通行的两种官方语言。话说回来,现在很多人说话,汉语里面插着不少英语单词,给老外也许也是怪怪的感觉。

這戲的偉大,在於它很短,就是被腰砍了,才播出11集(後來的dvd,出到14集),但不給人「爛尾」之感,而接續的電影版大結局serenity(衝出寧靜號),更是壯烈到驚人的地步,這麼艘破船,一船見錢眼開的爛傭兵,到最後,真是以命相博,就為了個,不知從哪撿來的,怪里怪氣的小屁孩。

這群人,最終不但揭漏了聯邦的無恥祕密,其代價更是無比昂貴,只因他們基本上是下定決心,命不要了,集體立志犧牲生命……。

至此,firefly 終於成就了一個影史的特例,一部被砍的小美劇,竟然能衍生出 serenity 這樣的電影鉅作,科幻鉅作,太空史詩鉅作,類型電影鉅作。它,不但成為影史特例之一,不但是影迷心中的cult,它,更變成影迷心目中的孤絕象徵。

片中,mal 帶領著寧靜號,抵抗聯邦。

戲外,我們這些影迷,也跟該死的fox電視台抵抗呢。

你把我們的影集砍了,我們用dvd的銷量,還有用電影版的賣座,證明你們的無知和罪惡!

(Joss Whedon:「這部電影本不該存在的」,他繼續說:「遭停播的電視劇,沒有資格拍成電影,除非製片、演員和影迷,能相信……這部電影,意義空前。」)

电影的结局以mal和river的对话,讲述了他和Serenity的关系,

You know what the first rule of flying is?

well, I suppose you do, since you already know what I’m about tot say.

Love. You can learn all the math in the ‘verse, but you take a boat in the air that you don’t love, she’ll shake you off just as sue as the turn of the worlds.

Love keeps her in the air when she ought to fall down, tells you she’s hurting before she keels.

Makes her a home.

How to wake up a pc by PHP

source: 
http://php.net/manual/en/ref.sockets.php
http://www.rkrishardy.com/2009/12/permission-denied-13-when-opening-socket-in-php-apache/

<?php
/**
 * Wake-on-LAN
 *
 * @return boolean
 *   TRUE:    Socked was created successfully and the message has been sent.
 *   FALSE:   Something went wrong
 *
 * @param string|array  $mac   You will WAKE-UP this WOL-enabled computer, you
 *                             need to add the MAC-address here. Mac can be
 *                             array too.
 *
 * @param string|array  $addr  You will send and broadcast to this address.
 *                             Normally you need to use the 255.255.255.255
 *                             address, so I made it as the default. You don't need to do anything with this.
 *                       
 *                             If you get permission denied errors when using
 *                             255.255.255.255 have permission denied problems
 *                             you can set $addr = false to get the broadcast
 *                             address from the network interface using the
 *                             ifconfig command.
 *
 *                             $addr can be array with broadcast IP values
 *
 * Example 1:
 *   When the message has been sent you will see the message "Done...."
 *   if ( wake_on_lan('00:00:00:00:00:00'))
 *      echo 'Done...';
 *   else
 *      echo 'Error while sending';
 */

function wake_on_lan($mac, $addr=false, $port=7) {
    if ($addr === false){
        exec("ifconfig | grep Bcast | cut -d \":\" -f 3 | cut -d \" \" -f 1",$addr);
        $addr=array_flip(array_flip($addr));
    }
    if(is_array($addr)){
        $last_ret = false;
        for ($i = 0; $i < count($addr); $i++)
            if ($addr[$i] !== false) {
                $last_ret = wake_on_lan($mac, $addr[$i], $port);
            }
        return $last_ret;
    }
    if (is_array($mac)){
        $ret = array();
        foreach($mac as $k =< $v)
            $ret[$k] = wake_on_lan($v, $addr, $port);
        return $ret;
    }
    //Check if it's an real MAC-address and split it into an array
    $mac = strtoupper($mac);
    if (!preg_match("/([A-F0-9]{1,2}[-:]){5}[A-F0-9]{1,2}/", $mac, $maccheck))
        return false;
    $addr_byte = preg_split("/[-:]/", $maccheck[0]);
 
    //Creating hardware adress
    $hw_addr = '';
    for ($a = 0; $a < 6; $a++)//Changing mac adres from HEXEDECIMAL to DECIMAL
        $hw_addr .= chr(hexdec($addr_byte[$a]));
  
    //Create package data
    $msg = str_repeat(chr(255),6);
    for ($a = 1; $a <= 16; $a++)
        $msg .= $hw_addr;
    //Sending data
    if (function_exists('socket_create')){
        //socket_create exists
        $sock = socket_create(AF_INET, SOCK_DGRAM, SOL_UDP);    //Can create the socket
        if ($sock){
            $sock_data = socket_set_option($sock, SOL_SOCKET, SO_BROADCAST, 1); //Set
            if ($sock_data){
                $sock_data = socket_sendto($sock, $msg, strlen($msg), 0, $addr,$port); //Send data
                if ($sock_data){
                    socket_close($sock); //Close socket
                    unset($sock);
                    return true;
                }
            }
        }
        @socket_close($sock);
        unset($sock);
    }
    $sock=fsockopen("udp://" . $addr, $port);
    if($sock){
        $ret=fwrite($sock,$msg);
        fclose($sock);
    }
    if($ret)
        return true;
    return false;  
}

if (@wake_on_lan('00:00:00:00:00:00')) {
    echo 'Done...';
} else {
    echo 'Error while sending';
}
?>

How do I start to to play videos automatically while boot?

Seems like the answer to your question is contained within an other question on this site.

I am trying to play videos automatically when the Raspberry Pi boots. I decided to use crontab for that:

@reboot /storage/.config/autostart.sh

The autostart.sh file contains the following code:

xbmc-send -a “PlayMedia(/storage/videos/)”

The Raspberry Pi successfully automatically starts to play videos from /storage/videos/ directory when it reboots.

Hope that helps.


This is like asking “How do I fix my car when it won’t start?” Your question is way to broad to answer. The process will remain basically the same form case to case. Here are some steps that you can go through to figure this out.

  1. GOOGLE
  2. Using Terminal, shell, SSH, etc., figure out the command that will start the video as desired.
  3. READ this document to figure out how to turn that shell command into a bash script.http://www.calpoly.edu/~rasplund/script.html
  4. READ this document to figure out how to run that bash script on boothttp://www.cyberciti.biz/faq/linux-execute-cron-job-after-system-reboot/
  5. Reboot, test and troubleshoot.

javascript如何阻止click事件连续触发

中包含一个checkbox,点击时不仅激活checkbox的click事件,还会激活td或者tr的click事件,称作bubble event。

解决方法是:

$(“table tbody td”).click(function(e){
if(e.target.nodeName.toUpperCase() == “INPUT”){
alert(“It’s an input!”);
return;
}else{
alert(“It’s not an input!”);
}
});

How can I kill a process by name instead of PID?

前段时间为了投票,在服务器上面开了N个php进程,每次要退出的时候都要ps -eaf|grep php,然后根据pid一个一个kill,傻傻的操作了很多次。其实早就知道有killall的指令,但一次都没用过。这次实在受不了了,还是查了一下,用下面这个方法挺好


kill `pidof php`

备用方法,未验证
export pid=`ps | grep process_name | awk 'NR==1{print $1}' | cut -d' ' -f1`;kill $pid
pkill -f "Process name" 这个试过了,因为是php xxx.php方式,貌似没法用。

晚安喵伴奏

网上听到一首小音乐,简单重复的节奏,时不时补充一点喵星人的声音,分享给大家,适合深夜的时候听听,更适合铲屎官。

[hana-flv-player video=”https://blog.wo.ai/test/miao.mp3″ width=”400″ description=”” player=”5″ autoload=”true” autoplay=”false” loop=”false” autorewind=”true” /]

树莓派spi液晶屏支持(fbtft)[转]


转自 老徐拉灯 的博客

原文地址:http://blog.csdn.net/xdw1985829/article/details/39583239

树莓派官方支持av及HDMI输出,板子上预留了一个csi接口的液晶显示屏,但是一直没有相应的模组出现。在很多应用场合我们需要一些小型的液晶屏显示一些基本的信息,所以小屏驱动很是必要。

在github上有一个开源工程:notro/fbtft,完整的实现了framebuffer驱动,让树莓派完美支持tft液晶,下面对移植过程进行一个简单说明

一、官网地址

工程首页:https://github.com/notro

fbtft源码:https://github.com/notro/fbtft

编译好的固件(基于3.12.25+):https://github.com/notro/rpi-firmware

使用说明(wiki):https://github.com/notro/fbtft/wiki

二、使用编译好的固件(3.12.25+)

环境:树莓派

https://github.com/notro/rpi-firmware

1、打开SPI

树莓派默认spi是关掉的,我们需要打开

sudo vi /etc/modprobe.d/raspi-blacklist.conf

把下面这句话前面的#号删掉

blacklist spi-bcm2708

2、下载:

1)以模块的形式编译进内核(需要手动或脚本加载模块)3.12.25+(试验成功
sudo REPO_URI=https://github.com/notro/rpi-firmware rpi-update
2)直接编译进内核(笔者没有试验
sudo REPO_URI=https://github.com/notro/rpi-firmware BRANCH=builtin rpi-update

3)以模块的形式编译进内核(需要手动或脚本加载模块,最新版本,笔者试过启动不起来,不知道哪出问题

sudo REPO_URI=https://github.com/notro/rpi-firmware BRANCH=latest rpi-update

4)直接下载压缩包,手动安装(适合树莓派不能联网的时候

http://tronnes.org/downloads/2014-06-20-wheezy-raspbian-2014-07-25-fbtft-master-firmware.zip

3、配置

1)手动加载模块:

sudo modprobe fbtft_device name=adafruit22

name后面的名字,要跟相应的液晶驱动芯片移植

笔者使用的液晶芯片为:fb_ra8875,所以这里写的是:er_tftm050_2

其它芯片请查阅:https://github.com/notro/fbtft/blob/master/fbtft_device.c 文件

正常会提示以下信息

fbtft_device:  SPI devices registered:
fbtft_device:      spidev spi0.0 500kHz 8 bits mode=0x00
fbtft_device:      spidev spi0.1 500kHz 8 bits mode=0x00
fbtft_device:  ‘fb’ Platform devices registered:
fbtft_device:      bcm2708_fb id=-1 pdata? no
fbtft_device: Deleting spi0.0
fbtft_device:  GPIOS used by ‘adafruit22’:
fbtft_device:    ‘reset’ = GPIO25
fbtft_device:    ‘led’ = GPIO23
fbtft_device:  SPI devices registered:
fbtft_device:      spidev spi0.1 500kHz 8 bits mode=0x00
fbtft_device:      fb_hx8340bn spi0.0 32000kHz 8 bits mode=0x00

graphics fb1: fb_hx8340bn frame buffer, 176×220, 75 KiB video memory, 16 KiB buffer memory, fps=20, spi0.0 at 32 MHz

在/dev/目录下出现: /dev/fb1设备

2)自动加载模块

sudo vi  /etc/modules

加入以下语句,既可以在启动时自动加载模块

spi-bcm2708

fbtft_device name=er_tftm050_2  speed=28000000 fps=25 verbose=0

红色部分根据实际情况调整,可能出现花屏现象
4、使用(官方给出的方法,笔者测试不成功)

1)手动启动x11和控制台到新的液晶屏
X Windows显示在fb1上:
$FRAMEBUFFER=/dev/fb1 startx

Console显示在fb1上:
$con2fbmap 1 1

2)自动登陆x11

sudo vi /etc/inittab
#1:2345:respawn:/sbin/getty –noclear 38400 tty1
1:2345:respawn:/bin/login -f pi tty1 </dev/tty1 >/dev/tty1 2>&1

sudo vi /etc/rc.local

su -l pi -c “env FRAMEBUFFER=/dev/fb1 startx &”

5、使用(笔者使用这个测试通过)

1)将fb0上的内容直接拷贝到fb1上,fb0和fb1同步

https://github.com/notro/fbtft/wiki/Framebuffer-use#framebuffer-mirroring

$git clone https://github.com/tasanakorn/rpi-fbcp

$cd rpi-fbcp/
$mkdir build
$cd build/
$cmake ..
$make
$sudo install fbcp /usr/local/bin/fbcp

启动:fbcp &

关闭fbcp:killall fbcp

2)启动时使用fb1

$sudo apt-get install xserver-xorg-video-fbdev

$sudo vi /usr/share/X11/xorg.conf.d/99-fbdev.conf

加入以下语句:

Section “Device”
Identifier “myfb”
Driver “fbdev”
Option “fbdev” “/dev/fb1”
EndSection

启动:startx


测试:

apt-get -y install fbi

fbi -d /dev/fb1 -T 1 -noverbose -a test.jpg

三、由内核及源码编译

1、下载、编译内核源码:

请见《树莓派开发系列教程8——树莓派内核编译与固件升级

2、下载、编译fbtft源码

$cd linux(进入下载好的内核源码目录)

$cd drivers/video

$git clone https://github.com/notro/fbtft.git(下载fbtft源码,也可以在别的地方下载好,拷贝过来)

   修改内核源码的Kconfig及Makefine

  Add to drivers/video/Kconfig:   source “drivers/video/fbtft/Kconfig”

  Add to drivers/video/Makefile:  obj-y += fbtft/

$make menuconfig(在配置界面加入所选用液晶的驱动支持)

  1.  Device Drivers  —>
  2.  Graphics support  —>
  3. <M> Support for small TFT LCD display modules  —>
  4. <M>   FB driver for the HX8353D LCD Controller
  5. <M>   FB driver for the ILI9320 LCD Controller
  6. <M>   FB driver for the ILI9325 LCD Controller
  7. <M>   FB driver for the ILI9340 LCD Controller
  8. <M>   FB driver for the ILI9341 LCD Controller
  9. < >     FB driver for the ILI9481 LCD Controller
  10. <M>   FB driver for the ILI9486 LCD Controller
  11. <M>   FB driver for the PCD8544 LCD Controller
  12. <M>   FB driver for the RA8875 LCD Controller

$make

基于树莓派Raspberry: 字符设备内核驱动程序框架编写[转]

之前写了一篇移植2.4寸TFT驱动到树莓派的文章,那篇博文中的驱动代码是国外大牛写的,看了一下,还是有很多地方没理解,是得好好再学习一下内核驱动的编写,这里就从字符设备驱动开始,采用最简单的LED驱动来建立内核驱动移植的驱动框架.

个人原创,转载请注明原文出处:

http://blog.csdn.net/embbnux/article/details/17712547

参考文章:

http://blog.csdn.net/hcx25909/article/details/16860725

内核驱动与普通单片机模块驱动的差别就是在于,写内核驱动的时候,要提供内核调用的接口,使内核能找到相应的驱动入口,用户通过告诉内核要干嘛,内核再去调用那个驱动,驱动的最底层和单片机模块是一样的,同样是对GPIO的操作,配置输入输出,以及某些特殊的寄存器. LED的点亮就是对GPIO的操作 .

对于ARM的GPIO调用需要通过IO映射的方法,要操作内存上对应的地址.

对于bcm2708上的io对应关系,可以查看bcm2835的手册,和stm32基本上是一样的,因为同为ARM体系:SouthEast

我参考的那博客讲这个比较清楚,可以参考下,由于树莓派的内核以及很好的提供了GPIO调用的接口,即把内存操作封装了很好,这里就不像那篇博客那样再自己写函数通过内存操作来进行GPIO操作,觉得有点麻烦,但是对于学好底层很有用.

  一  首先上个驱动程序


这里直接把该程序添加到内核的源码目录里面,也可在自己的目录下,但是要写Makefile.

在/drivers/char/新建rasp_led.c,内核中的kconfig文件和makefile文件,参照前一篇文章

led.c:

1
2
3
4
5
6
7
8
9
10
11
12
13
14
15
16
17
18
19
20
21
22
23
24
25
26
27
28
29
30
31
32
33
34
35
36
37
38
39
40
41
42
43
44
45
46
47
48
49
50
51
52
53
54
55
56
57
58
59
60
61
62
63
64
65
66
67
68
69
70
71
72
73
74
75
76
77
78
79
80
81
82
83
84
85
86
87
88
89
90
91
92
93
94
95
96
97
98
99
100
101
102
103
104
105
106
107
108
109
110
111
112
113
114
115
116
117
118
119
120
121
122
123
124
125
/********************************************************************/
/***************Rasp led 驱动程序************************************/
/***************作者: Embbnux Ji*************************************/
/***************博客: http://blog.csdn.net/embbnux/ *****************/
/********************************************************************/
#include <linux/kernel.h>
#include <linux/module.h>
#include <linux/device.h>
#include <mach/platform.h>&nbsp;&nbsp;&nbsp;&nbsp;&nbsp;&nbsp;
#include <linux/platform_device.h>
#include <linux/types.h>
#include <linux/fs.h>
#include <linux/ioctl.h>
#include <linux/cdev.h>
#include <linux/delay.h>
#include <linux/uaccess.h>
#include <linux/init.h>
#include <linux/gpio.h>
#define DEVICE_NAME "Pi_Led"
#define DRIVER_NAME "pi_led"
//class声明内核模块驱动信息,是UDEV能够自动生成/dev下相应文件
static dev_t pi_led_devno; //设备号
static struct class *pi_led_class;
static struct cdev pi_led_class_dev;
struct gpio_chip *gpiochip;
#define led_pin 4 //gpio 4
//这部分函数为内核调用后open的设备IO操作,和裸板程序一样
int open_flag=0;
static int pi_led_open(struct inode *inode, struct file *filp)
{
 printk("Open led ing!\n");
 if(open_flag ==0){
 open_flag =1;
 printk("Open led success!\n");
 return 0;
 }
 else{
 printk("Led has opened!\n");
 }
 return 0;
}
//这部分函数为内核调用后ioctl的设备IO操作,和裸板程序一样
static long pi_led_ioctl(struct file *filp, unsigned int cmd, unsigned long arg)
{
 switch(cmd){
 case 0:
 gpiochip->set(gpiochip, led_pin, 0);
 printk("Led up!\n");
 break;
 case 1:
 gpiochip->set(gpiochip, led_pin, 1);
 printk("Led down!\n");
 break;
 }
 return 0;
}
static int pi_led_release(struct inode *inode,struct file *file){
 printk("Led has release!\n");
 return 0;
}
//file_operations使系统的open,ioctl等函数指针指向我们所写的led_open等函数,
//这样系统才能够调用
static struct file_operations pi_led_dev_fops = {
 .owner =THIS_MODULE,
 .open =pi_led_open,
 .unlocked_ioctl = pi_led_ioctl,
 .release = pi_led_release,
};
static int is_right_chip(struct gpio_chip *chip, void *data)
{
if (strcmp(data, chip->label) == 0)
 return 1;
 return 0;
}
//内核加载后的初始化函数.
static int __init pi_led_init(void)
{
 struct device *dev;
 int major; //自动分配主设备号
 major = alloc_chrdev_region(&pi_led_devno,0,1,DRIVER_NAME);
 //register_chrdev 注册字符设备使系统知道有LED这个模块在.
 cdev_init(&pi_led_class_dev, &pi_led_dev_fops);
 major = cdev_add(&pi_led_class_dev,pi_led_devno,1);
 //注册class
 pi_led_class = class_create(THIS_MODULE,DRIVER_NAME);
 dev = device_create(pi_led_class ,NULL,pi_led_devno,NULL,DRIVER_NAME);
 gpiochip = gpiochip_find("bcm2708_gpio", is_right_chip);
 gpiochip->direction_output(gpiochip, led_pin, 1);
 gpiochip->set(gpiochip, led_pin, 0);
 printk("pi led init ok!\n");
 return 0;
}
//内核卸载后的销毁函数.
void pi_led_exit(void)
{
 gpio_free(led_pin);
 device_destroy(pi_led_class,pi_led_devno);
 class_destroy(pi_led_class);
 cdev_del(&pi_led_class_dev);
 unregister_chrdev_region(pi_led_devno, 1);
 printk("pi led exit ok!\n");
}
module_init(pi_led_init);
module_exit(pi_led_exit);
MODULE_DESCRIPTION("Rasp Led Driver");
MODULE_AUTHOR("Embbnux Ji < http://blog.csdn.net/embbnux >");
MODULE_LICENSE("GPL");

二  源码框架分析

我们首先从内核模块的入口,module_init(pi_led_init)这个函数看起,可以看出初始化后调用pi_led_init这个函数.

1
2
3
4
5
6
7
8
9
10
11
12
13
14
15
16
17
18
19
20
21
//内核加载后的初始化函数.
static int __init pi_led_init(void)
{
 struct device *dev;
 int major; //自动分配主设备号
 major = alloc_chrdev_region(&pi_led_devno,0,1,DRIVER_NAME);
 //register_chrdev 注册字符设备使系统知道有LED这个模块在.
 cdev_init(&pi_led_class_dev, &pi_led_dev_fops);
 major = cdev_add(&pi_led_class_dev,pi_led_devno,1);
 //注册class
 pi_led_class = class_create(THIS_MODULE,DRIVER_NAME);
 dev = device_create(pi_led_class ,NULL,pi_led_devno,NULL,DRIVER_NAME);
 gpiochip = gpiochip_find("bcm2708_gpio", is_right_chip);
 gpiochip->direction_output(gpiochip, led_pin, 1);
 gpiochip->set(gpiochip, led_pin, 0);
 printk("pi led init ok!\n");
 return 0;
}

初始化时首先分配给这个函数设备号,注册该设备,通过class注册使能够在/dev/目录下自动生成相应的设备文件,用户通过操作这个文件,来告诉内核怎么做.

由于是字符设备,所以对该文件的操作通过open,write,ioctl等函数,所以要把这个函数和底层的操作函数对应起来,这就要用到file_operation这个结构体,来声明:

1
2
3
4
5
6
7
8
//file_operations使系统的open,ioctl等函数指针指向我们所写的led_open等函数,
//这样系统才能够调用
static struct file_operations pi_led_dev_fops = {
 .owner =THIS_MODULE,
 .open =pi_led_open,
 .unlocked_ioctl = pi_led_ioctl,
 .release = pi_led_release,
};

这里就让open函数对应到pi_led_open函数,ioctl函数对应到pi_led_ioctl函数;

然后我们就只需要编写相应的pi_led_open以及pi_led_ioctl;这些函数里面的操作就是最底层的GPIO操作,和单片机是一样的.

三  GPIO操作

内核里面的GPIO操作函数,被定义在#include <linux/gpio.h>,这个头文件里面,树莓派官方做好了树莓派的GPIO在内核里面的注册,所以调用gpio.h里面的函数即可进行树莓派的GPIO操作.

1
gpiochip = gpiochip_find("bcm2708_gpio", is_right_chip);

通过上面这个函数把内核的GPIO操作和BCM2708的GPIO操作关联起来;

bcm2708的操作可以查看/arch/arm/mach-bcm2708/bcm2708_gpio.c文件,具体也是对内存地址的操作:

1
2
3
4
5
6
7
8
9
10
11
12
13
#define GPIOFSEL(x) (0x00+(x)*4)
#define GPIOSET(x) (0x1c+(x)*4)
#define GPIOCLR(x) (0x28+(x)*4)
#define GPIOLEV(x) (0x34+(x)*4)
#define GPIOEDS(x) (0x40+(x)*4)
#define GPIOREN(x) (0x4c+(x)*4)
#define GPIOFEN(x) (0x58+(x)*4)
#define GPIOHEN(x) (0x64+(x)*4)
#define GPIOLEN(x) (0x70+(x)*4)
#define GPIOAREN(x) (0x7c+(x)*4)
#define GPIOAFEN(x) (0x88+(x)*4)
#define GPIOUD(x) (0x94+(x)*4)
#define GPIOUDCLK(x) (0x98+(x)*4)

这里定义的就是相应的GPIO寄存器的地址.

四  测试程序

ssh进入树莓派,在主目录下新建led.c

1
2
3
4
5
6
7
8
9
10
11
12
13
14
15
16
17
18
19
20
21
22
23
24
25
26
27
28
#include<stdio.h>
 #include <stdlib.h>
 #include <unistd.h>
 #include <sys/ioctl.h>
 #include <sys/time.h>
 int main(int argc, char **argv)
 {
 int on;
 int led_no;
 int fd;
 int i;
fd = open("/dev/pi_led", 0);
 if (fd < 0) {
 fd = open("/dev/pi_led", 0);
 }
 if (fd < 0) {
 perror("open device led");
 exit(1);
 }
for(i=0;i<=20;i++){
on = i%2;
ioctl(fd, on, led_no);
sleep(1);
}
close(fd);
return 0;
}

Center

加载postgres模块后apache无法启动

想在本地搭建一个PostgreSQL的运行环境,完成之后,始终在apache/php环境无法加载postgresql模块。启动的时候无法加载libpq.dll,将postgresql的libpq拷贝到php目录无效,拷贝到windows目录无效,拷贝到windows\system32目录也无效,只好在网上找解决方法。搜到以下方法:

refering to the libpq.dll that comes bundled with PHP, like this:

LoadFile “C:/php/libpq.dll”

(原文地址:http://stackoverflow.com/questions/551734/php-not-loading-php-pgsql-dll-on-windows)

在http.conf文件中增加这一行,完美解决。其实这个答案之前有混淆的问题,比如加载pg目录的libpq.dll,似乎无效,只能用php目录里面自带的libpq.dll。

Firefox 调试 插件/扩展

在一个项目中要开发一个firefox的扩展,结果一直没找到好的调试方法,痛苦的要命。之前在网上找到用chromebug,试了很多次都没有成功,只好在代码里面用代码打印到控制台。

项目已经过去了很久,最近需要修改点代码,重新遇到调试的问题,在网上又搜了一遍,找到了一个方法,测试了一下,居然可以设置断点调试了,可喜可贺。

方法就是修改firefox的设置,在地址栏输入about:config,然后允许chrome调试和远程调试:

devtools.chrome.enable => true

devtools.debugger.remote-enable => true

然后在firefox里Tools > Web Developer > Browser Console.,打开调试窗口,里面有个debugger,这里就可以开始了。


以下是原文和地址

http://stackoverflow.com/questions/17547364/how-to-debug-a-firefox-extension-with-chromebug/17579253#17579253

Update April 2014: The browser debugger is now integrated in the “Browser Toolbox” and you no longer need to set about:config prefs. Just use the developer tools configuration/settings panel: “enable chrome debugging” and “enable remote debugging”. The “Browser Toolbox” will then be available in the developer tools panel.

Chromebug has not worked for me for many months. I think it’s just been silently abandoned but thankfully on Firefox 19 or later, it’s possible to use the built-in JS debugger on the browser itself. Go to about:config and set the following two prefs:

devtools.chrome.enabled: true
devtools.debugger.remote-enabled: true

After you restart the browser, the Web Developer menu will contain a “Browser Debugger” entry.

More info here: https://developer.mozilla.org/en/docs/Debugging_JavaScript

If possible, I’d suggest using Aurora for your debugging because the built-in debugger was a little limited when first launched and keeps getting better with every release.

Arduino学习笔记A11 – Arduino模拟电脑键盘(基于AVR-USB的USB-HID设备) [转]

Arduino模拟电脑键盘(基于AVR-USB的USB-HID设备)

关于此帖子的其他讨论,还可以看看
http://geek-workshop.com/thread-2303-1-1.html
http://geek-workshop.com/thread-2310-1-1.html

键盘作为经典的输入设备,使用在很多互动中都有特别的优势,比如我们可以通过键盘直接给flash传递按键事件。而无需通过串口之类的特殊接口,虽然我们可以拆一个传统的键盘,然后将里面的按键引出来,但是这样有一个缺点,就是键值不能动态改变并且不能一次多键。使用模拟键盘的话,我们就可以随意在程序设置按键的时间和键值。比如本文的例子就是按下一个按键,模拟键盘就在电脑输入“HELLO WORLD”。

硬件部分:
材料清单:
Arduino x1
68Ω电阻 x2 (没有68Ω的话,用50~100Ω电阻也行)
2.2kΩ电阻 x1 (没有2.2kΩ的话,用1.5k~2.2k电阻也行)
USB连接线(一端是USB口,另一端是电线) x1
3.6v 稳压管(建议选用功耗0.25~0.5w的)x2
194146uld4tdhd1b111w9d1942021gy6n1v41yne26ia

电路原理图:
120616mer6qi8i8smt5qs6
电路图解说:
1、两个68Ω的电阻起到限流和保护作用,防止在意外情况下损坏计算机的USB端口或单片机的端口。
2、2.2kΩ电阻是上拉电阻,用于分辨总线状态。如果上拉电阻接于D+和+5v端则是高速USB设备,接于D-与+5v端,则是低速设备。此处键盘传输速率不高,接到D-作为低速设备即可。
3、D+和D-上的3.6V稳压二极管D1和D2起到限制数据线上的电平的作用。因为在USB规范中规定数据线D+和D-上的电平范围是3.0V至3.6V,而AVR单片机的输出电平是Vcc。如果单片机的Vcc是5V,在没有D1和D2的情况下将造成电平不匹配,会造成在很多计算机中无法正确识别出USB设备。如果用户系统的Vcc在3.0V至3.6V之间,就可以省略这两个稳压二极管。从这里也可以看出用户系统的Vcc必须高于3V。
4、由于低速AVRUSB所需要的是1.5MHz时钟,而单片机每8条指令就能精确完成一个数据位的采集。所以AVRUSB最小单片机时钟频率是12MHz。并且可以使用的时钟频率有12MHz、12.8MHz、15MHz、16MHz、16.5MHz、20MHz,其他的不支持。所以如果使用最小系统制作此模拟键盘的话8MHz的话,ATMega8L不能用。
————————
软件部分:

Arduino支持库文件:
http://soft1.wmzhe.com/download/ … ino/UsbKeyboard.zip
UsbKeyboard.zip (112.45 KB, 下载次数: 1421)
文件下载后解压到arduino编译器的libraries文件夹下面。

注意:

1、UsbKeyboard库中,usbconfig.h里面可以更改USB接线的引脚定义,下面给出一个大概解释(下面的PORTD是指AVR单片机的PORTD,要查询Arduino原理图才能得到是Arduino的哪个引脚):

#define USB_CFG_IOPORTNAME D
USB输入输出引脚使用AVR单片机的PORTD,如果改成B就是使用PORTB
#define USB_CFG_DMINUS_BIT 4
USB的D-接PORTD的第四位PD4,对应Arduino D4
#define USB_CFG_DPLUS_BIT  2
USB的D+接PORTD的第二位PD2,对应Arduino D2
#define USB_CFG_PULLUP_IOPORTNAME D
USB上拉引脚使用AVR单片机的PORTD,如果改成B就是使用PORTB
#define USB_CFG_PULLUP_BIT  5
USB的上拉电阻接PORTD的第五位PD5,对应Arduino  D5

2、在UsbKeyboard库的UsbKeyboard.h里面,有关于模拟键值的表
#define KEY_A       4
#define KEY_B       5
#define KEY_C       6
#define KEY_D       7
#define KEY_E       8
等。但不齐全。经过测试,其实这个键盘基本可以模拟几乎所有键值(Power,Sleep,Pause似乎不能)。
比如方向键右左下上分别对应79,80,81,82数字。即写成
UsbKeyboard.sendKeyStroke(79);
UsbKeyboard.sendKeyStroke(81);
等。由于整理比较麻烦,大家可以自己下载个KeyboardTest软件测试不同数字下面的键值。

程序示例:
下面的例子演示了用Arduino虚拟键盘的应用例子。打开记事本,然后将Arduino的D12引脚和GND连起来,就会打印HELLO WORLD字样。

ARDUINO 代码复制打印

  1. /*
  2. Arduino模拟键盘 by Ansifa
  3. 2012.6.8
  4. 功能描述:插上此模拟键盘,打开记事本,然后按下按钮,即可在记事本打印出HELLO WORLD字样
  5. 接线方法:
  6. <img src=”http://www.geek-workshop.com/forum.php?mod=image&aid=5359&size=300×300&key=e9fa5559e6d5724d51f770bc6c55b941&nocache=yes&type=fixnone” border=”0″ aid=”attachimg_5359″ alt=””>
  7. Arduino D2接68Ω电阻后,接USB线D+
  8. Arduino D4接68Ω电阻后,接USB线D-
  9. Arduino D5接2.2kΩ电阻后,接USB线D-
  10. Arduino D2接3.6v稳压管到GND
  11. Arduino D4接3.6v稳压管到GND
  12. +5v接USB线VCC
  13. GND接USB线GND
  14. Arduino D1接一个开关到GND
  15. 附:USB线序颜色(由于各生产厂不同,不一定准确,仅供参考)
  16. *USB键鼠:      |        *USB接口
  17. 白<->VCC        |        红<->VCC
  18. 橙<->D-         |        白<->D-
  19. 绿<->D+         |        绿<->D+
  20. 蓝<->GND        |        黑<->GND
  21. */
  22. #include “UsbKeyboard.h”
  23. int KEYPIN = 1;                //按键接在D1引脚,也可以改成任何引脚
  24. void setup()
  25. {
  26.   TIMSK0 &= !(1 << TOIE0);        //
  27.   pinMode(KEYPIN, INPUT);
  28.   digitalWrite(KEYPIN, HIGH);
  29. }
  30. void loop()
  31. {
  32.   UsbKeyboard.update();
  33.   if(digitalRead(KEYPIN) == HIGH)
  34.   {
  35.     delay(100);
  36.     if(digitalRead(KEYPIN) == LOW)
  37.     {
  38.       UsbKeyboard.sendKeyStroke(KEY_H);
  39.       UsbKeyboard.sendKeyStroke(KEY_E);
  40.       UsbKeyboard.sendKeyStroke(KEY_L);
  41.       UsbKeyboard.sendKeyStroke(KEY_L);
  42.       UsbKeyboard.sendKeyStroke(KEY_O);
  43.       UsbKeyboard.sendKeyStroke(KEY_SPACE);
  44.       UsbKeyboard.sendKeyStroke(KEY_W);
  45.       UsbKeyboard.sendKeyStroke(KEY_O);
  46.       UsbKeyboard.sendKeyStroke(KEY_R);
  47.       UsbKeyboard.sendKeyStroke(KEY_L);
  48.       UsbKeyboard.sendKeyStroke(KEY_D);
  49.       UsbKeyboard.sendKeyStroke(KEY_ENTER);
  50.     }
  51.   }
  52. }

注意,先插上Arduino数据线,将程序写入Arduino。然后拔掉数据线,将模拟键盘USB线接到电脑,即可使用。

下面随便点实物图

刚焊好的正反面
194204xv880393zvisyxn32154270440zvdpvvocmaqc

插数据线写程序进Arduino:
1941595x18zxgzaan1fgk5

转自http://www.geek-workshop.com/thread-1137-1-1.html, 版权归原作者所有